3D scanning & Printing
In the fifth week of our course, we explored 3D scanning and printing techniques. We learned how to scan objects or spaces to create digital models for editing, as well as the history and technology behind 3D printing. This session covered various scanning technologies, 3D printing machines, materials like PLA, and essential software tools. By the end, we practiced scanning spaces and objects, followed by printing customized designs.
Steps
- Step 01. 3D Scanning Process
- Step 02. 3D Scanning Exercise
- Step 03. Introduction to 3D Printing
- Step 04. Printing a Watering Can
- Difficulty
- 4
- Tools
- Skanect
- Agisoft
- Meshroom
- Meshmixer
- Materials
- PLA
- SLS
Files
Step 01.
3D Scanning Process
Step 1: Choose a Scanning Method
Types: SLS (Selective Laser Sintering), Lidar, Photogrammetry, Laser Scanning.
Benefits: Scanning is fast (as quick as 2 seconds), highly accurate, and portable.
Step 2: Capture High-Quality Images
Texture: Use objects with textures to better understand volume.
Overlap: Take plenty of overlapping photos to ensure smooth model generation.
Angles: Vary the camera angles (cenital, orbital, cylindrical) for full coverage.
Step 3: Use Scanning Software
Autodesk Recap Photo: Easy to use, cloud-based.
Meshroom/AliceVision: Open-source but not compatible with Mac.
Agisoft/Metashape: Powerful but expensive.
Sketchfab/Cloud Compare: Great for 3D point clouds.
Step 02.
3D Scanning Exercise
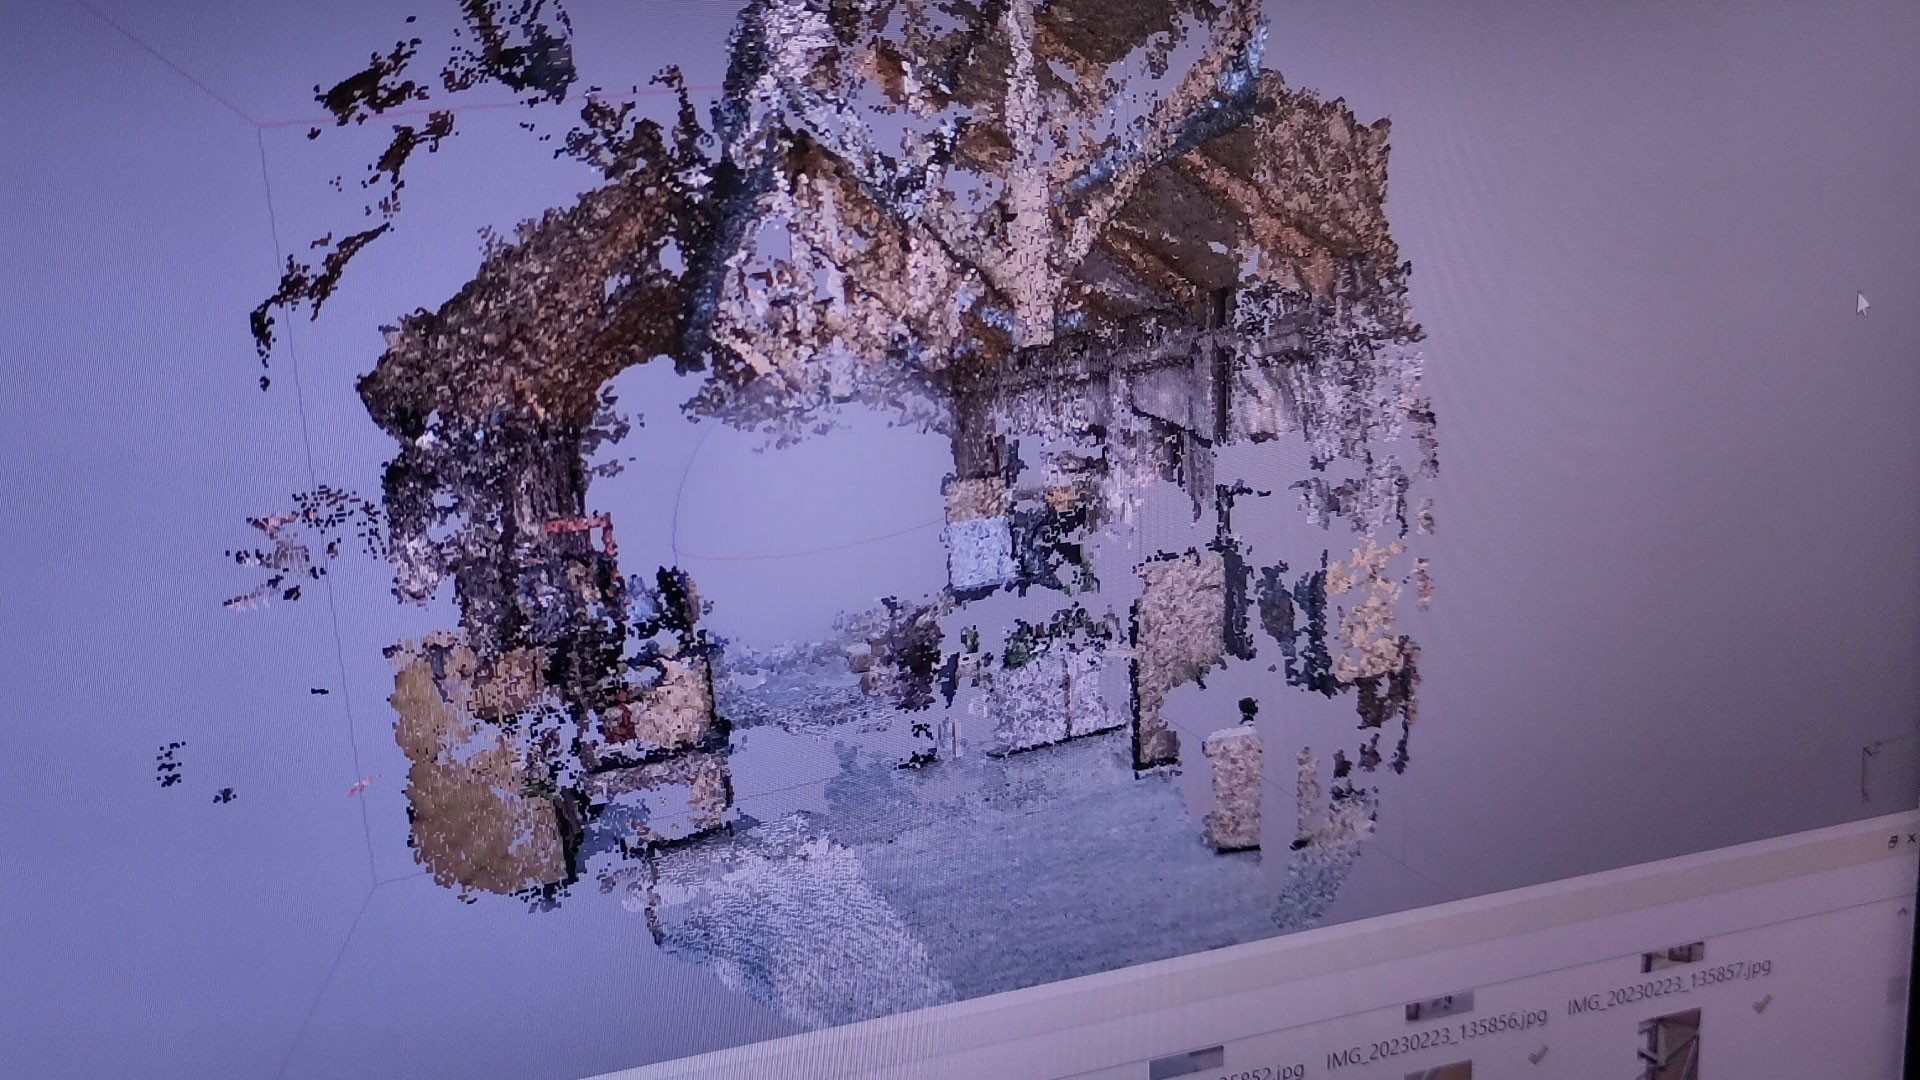
Exercise 1: Scanning a Location
Objective: Scan a space (e.g., Ca l’Alier, Barcelona) for exhibition planning.
Process: Took 70 photos, uploaded them into Agisoft. Realized more photos were needed, so next time, more angles will be captured.
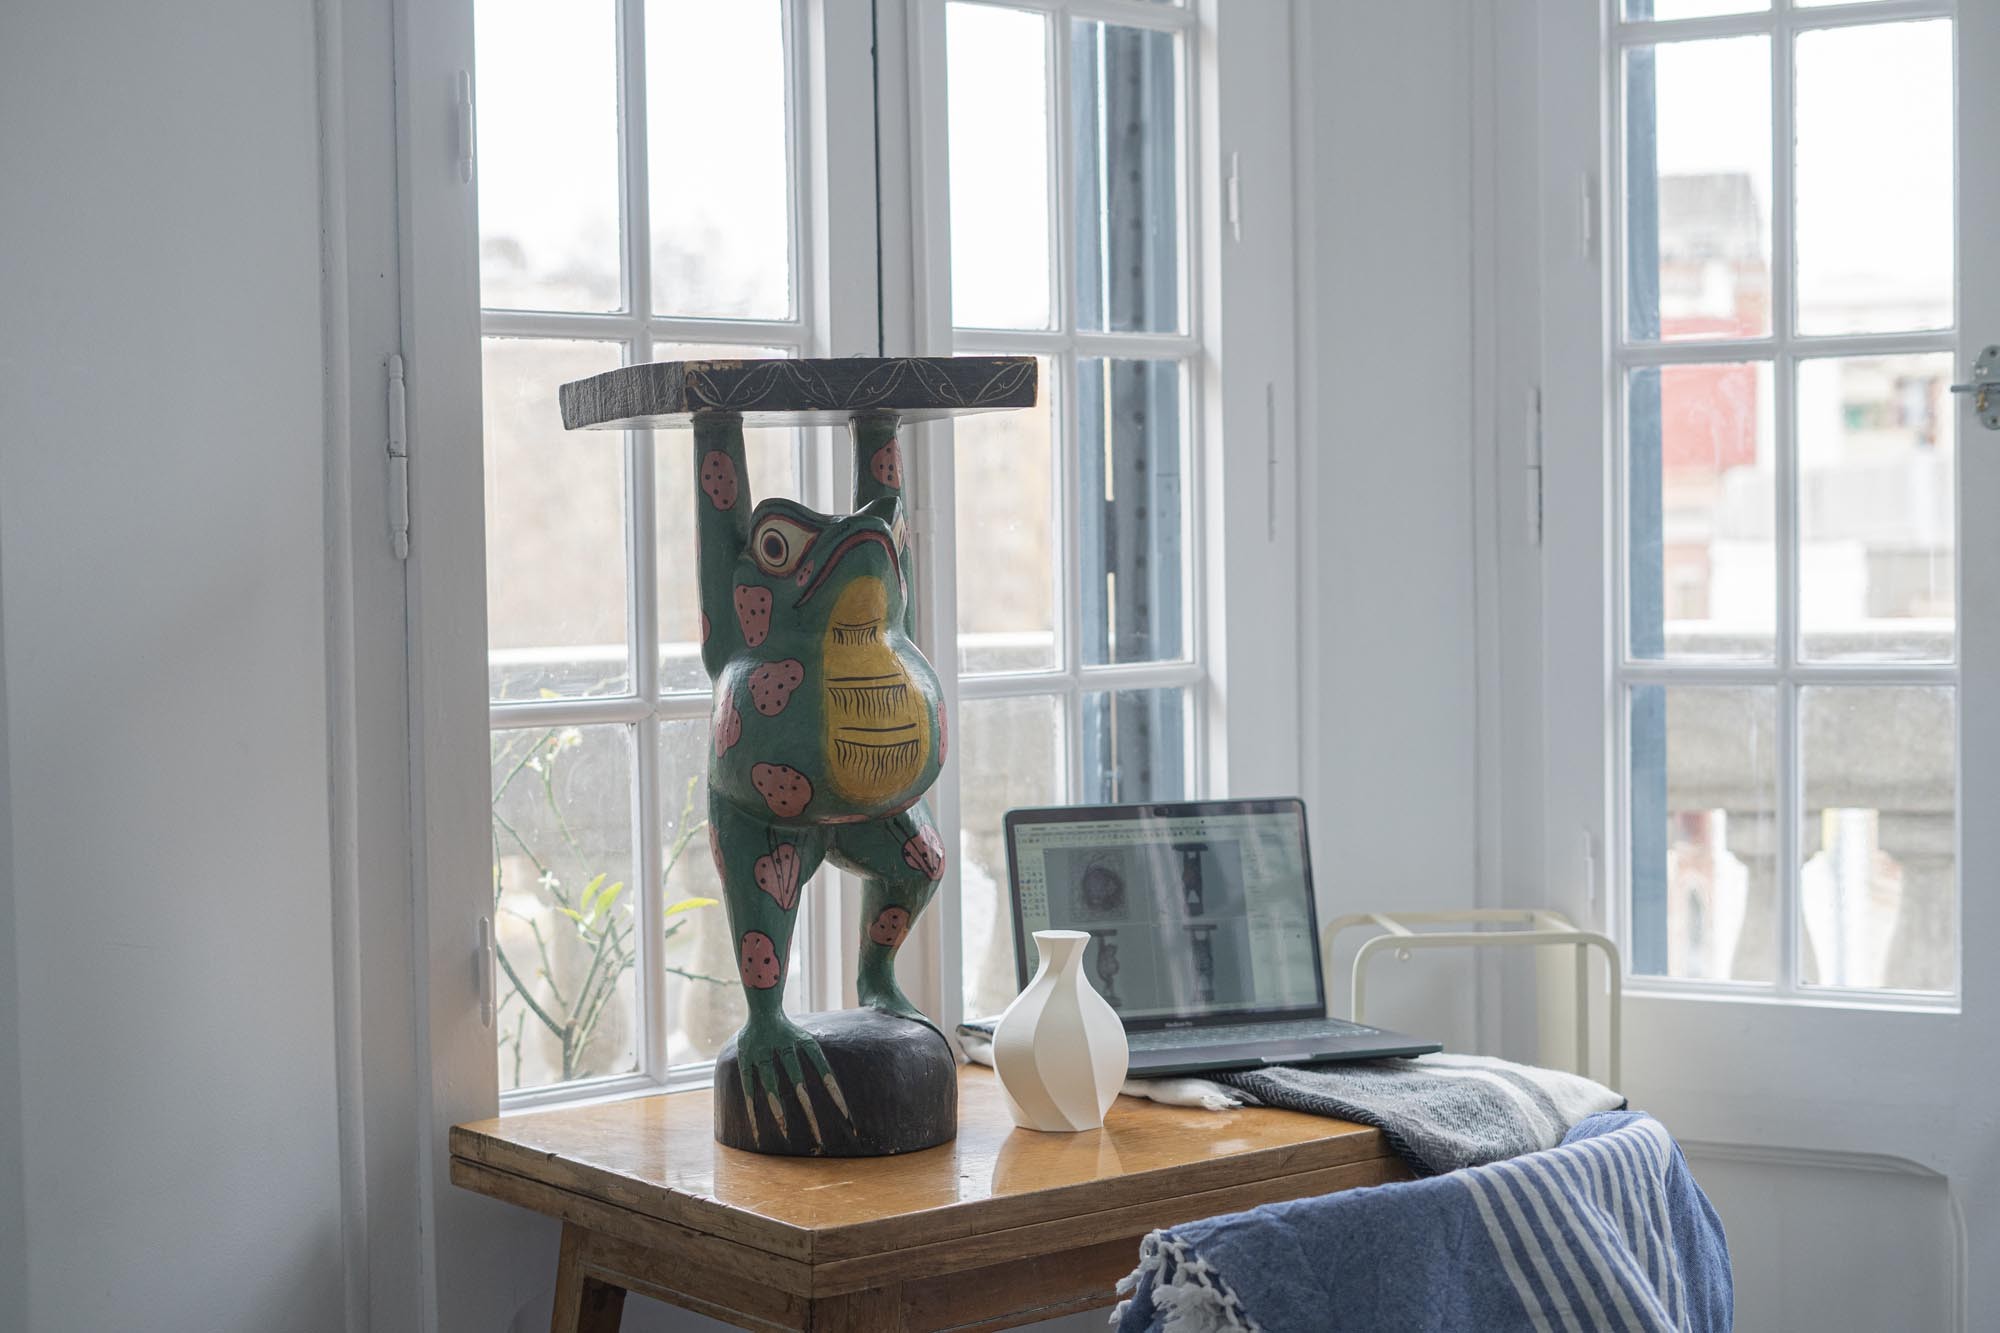
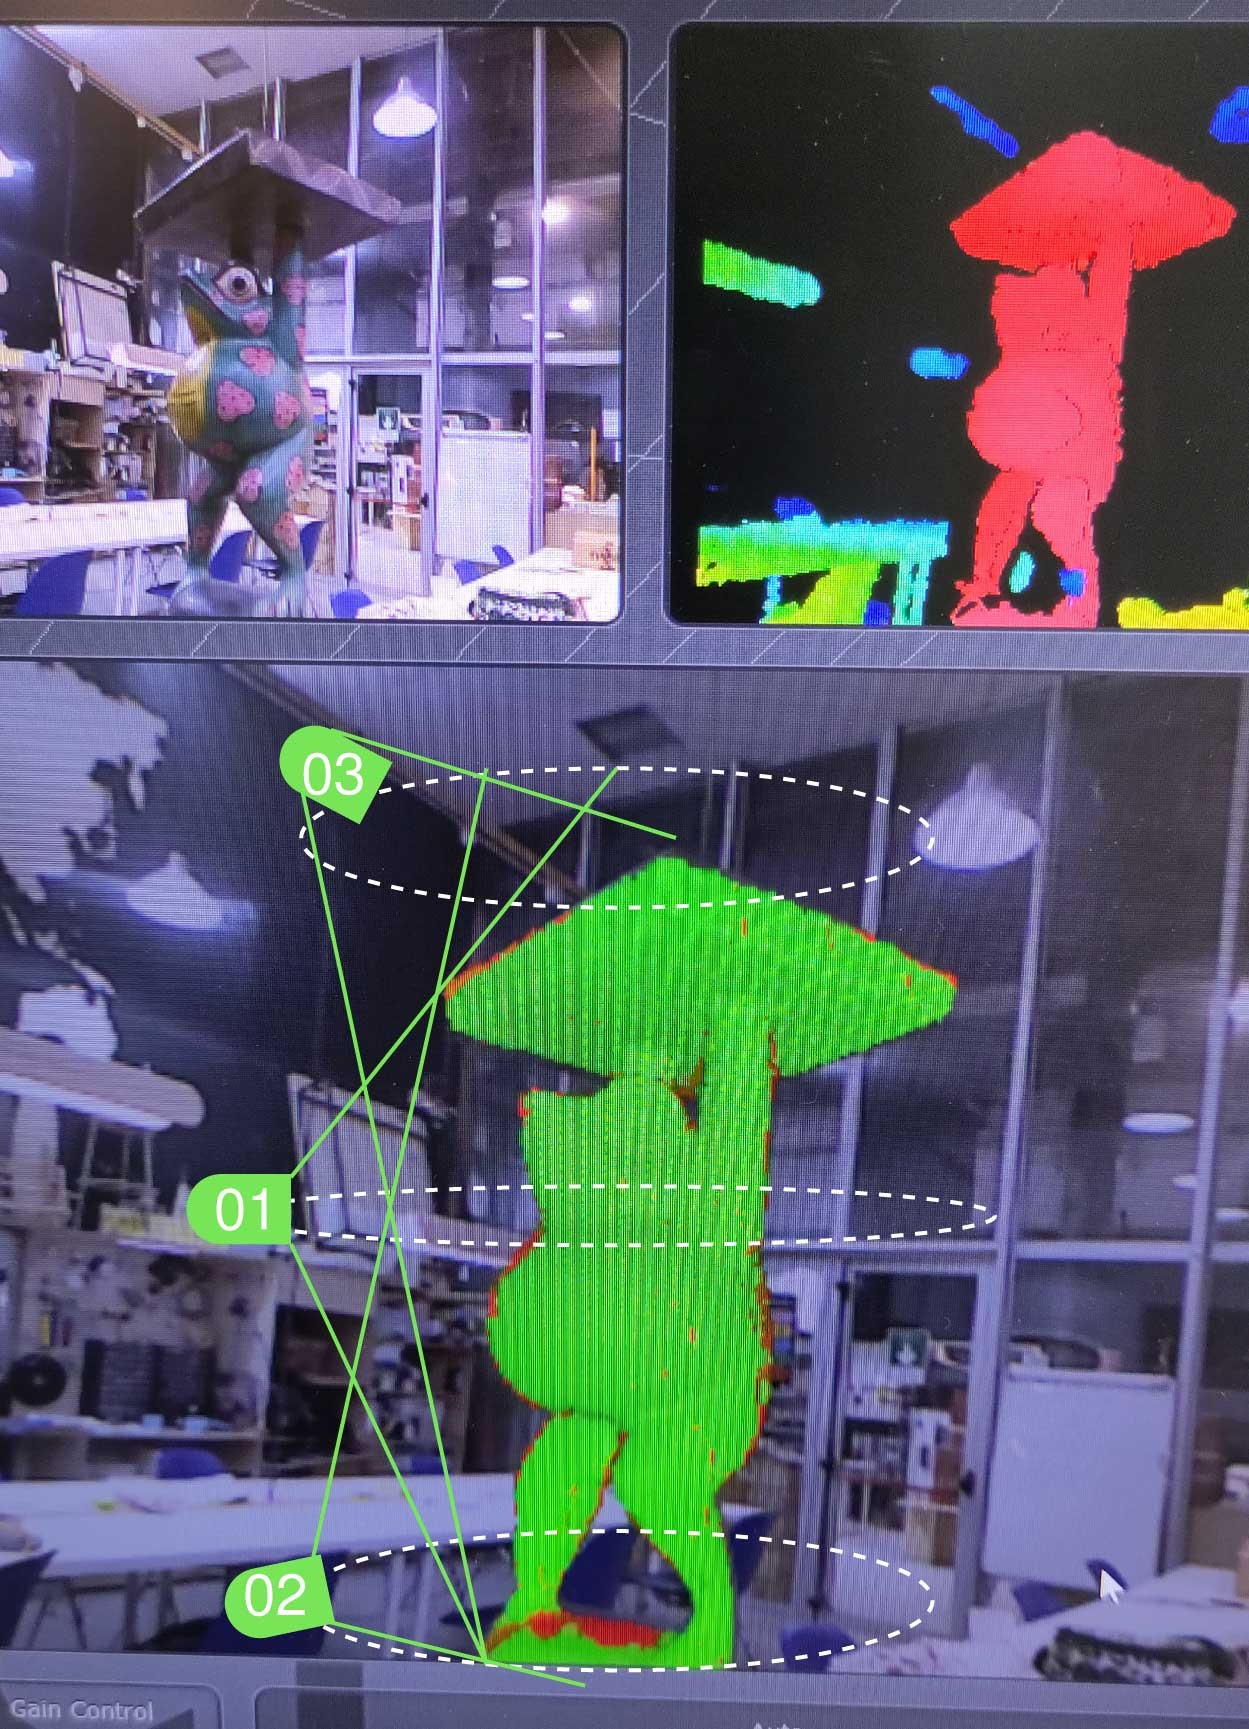
Exercise 2: Scanning an Object
Objective: Scan a wooden frog.
Process: Placed the object on a paint pot, scanned using Skanect software, taking 360-degree shots and adjusting angles. Edited the scan by removing the base and adding details before exporting the file as OBJ for future editing.
<div class="sketchfab-embed-wrapper"> <iframe title="Frog" frameborder="0" allowfullscreen mozallowfullscreen="true" webkitallowfullscreen="true" allow="autoplay; fullscreen; xr-spatial-tracking" xr-spatial-tracking execution-while-out-of-viewport execution-while-not-rendered web-share src="https://sketchfab.com/models/51b87c6b4eeb4ebda08fb81f28a43d60/embed"> </iframe> <p style="font-size: 13px; font-weight: normal; margin: 5px; color: #4A4A4A;"> <a href="https://sketchfab.com/3d-models/frog-51b87c6b4eeb4ebda08fb81f28a43d60?utm_medium=embed&utm_campaign=share-popup&utm_content=51b87c6b4eeb4ebda08fb81f28a43d60" target="_blank" rel="nofollow" style="font-weight: bold; color: #1CAAD9;"> Frog </a> by <a href="https://sketchfab.com/manuelafablab?utm_medium=embed&utm_campaign=share-popup&utm_content=51b87c6b4eeb4ebda08fb81f28a43d60" target="_blank" rel="nofollow" style="font-weight: bold; color: #1CAAD9;"> manuelafablab </a> on <a href="https://sketchfab.com?utm_medium=embed&utm_campaign=share-popup&utm_content=51b87c6b4eeb4ebda08fb81f28a43d60" target="_blank" rel="nofollow" style="font-weight: bold; color: #1CAAD9;">Sketchfab</a></p></div>
Step 03.
Introduction to 3D Printing
3D printing is an additive manufacturing process that builds objects layer by layer using materials like PLA. It allows for intricate designs without the need for traditional methods like sculpting or forging.
Benefits:
Low material waste
Cost-effective and efficient
Fast learning curve
Great for prototyping and short-run production
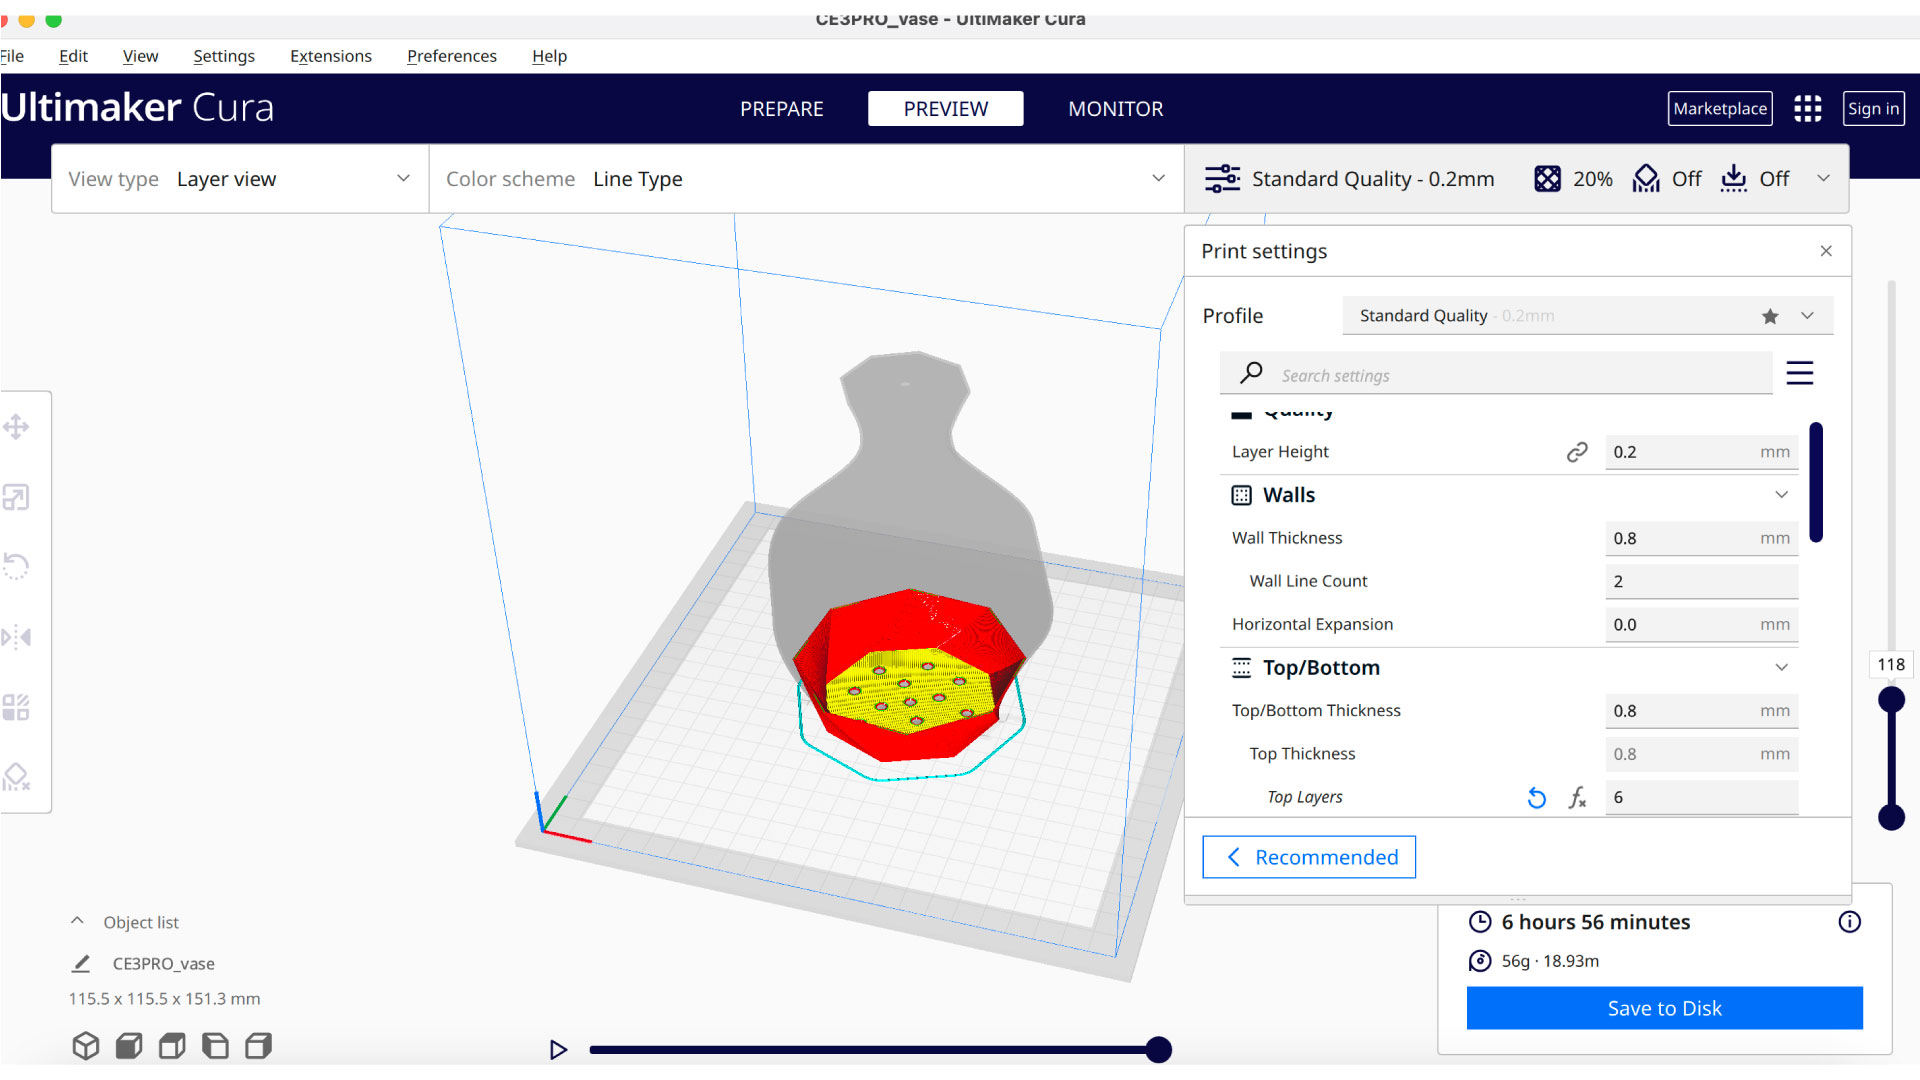
Step 1: Prepare Your Files
Software: Open your 3D model in Ultimaker Cura.
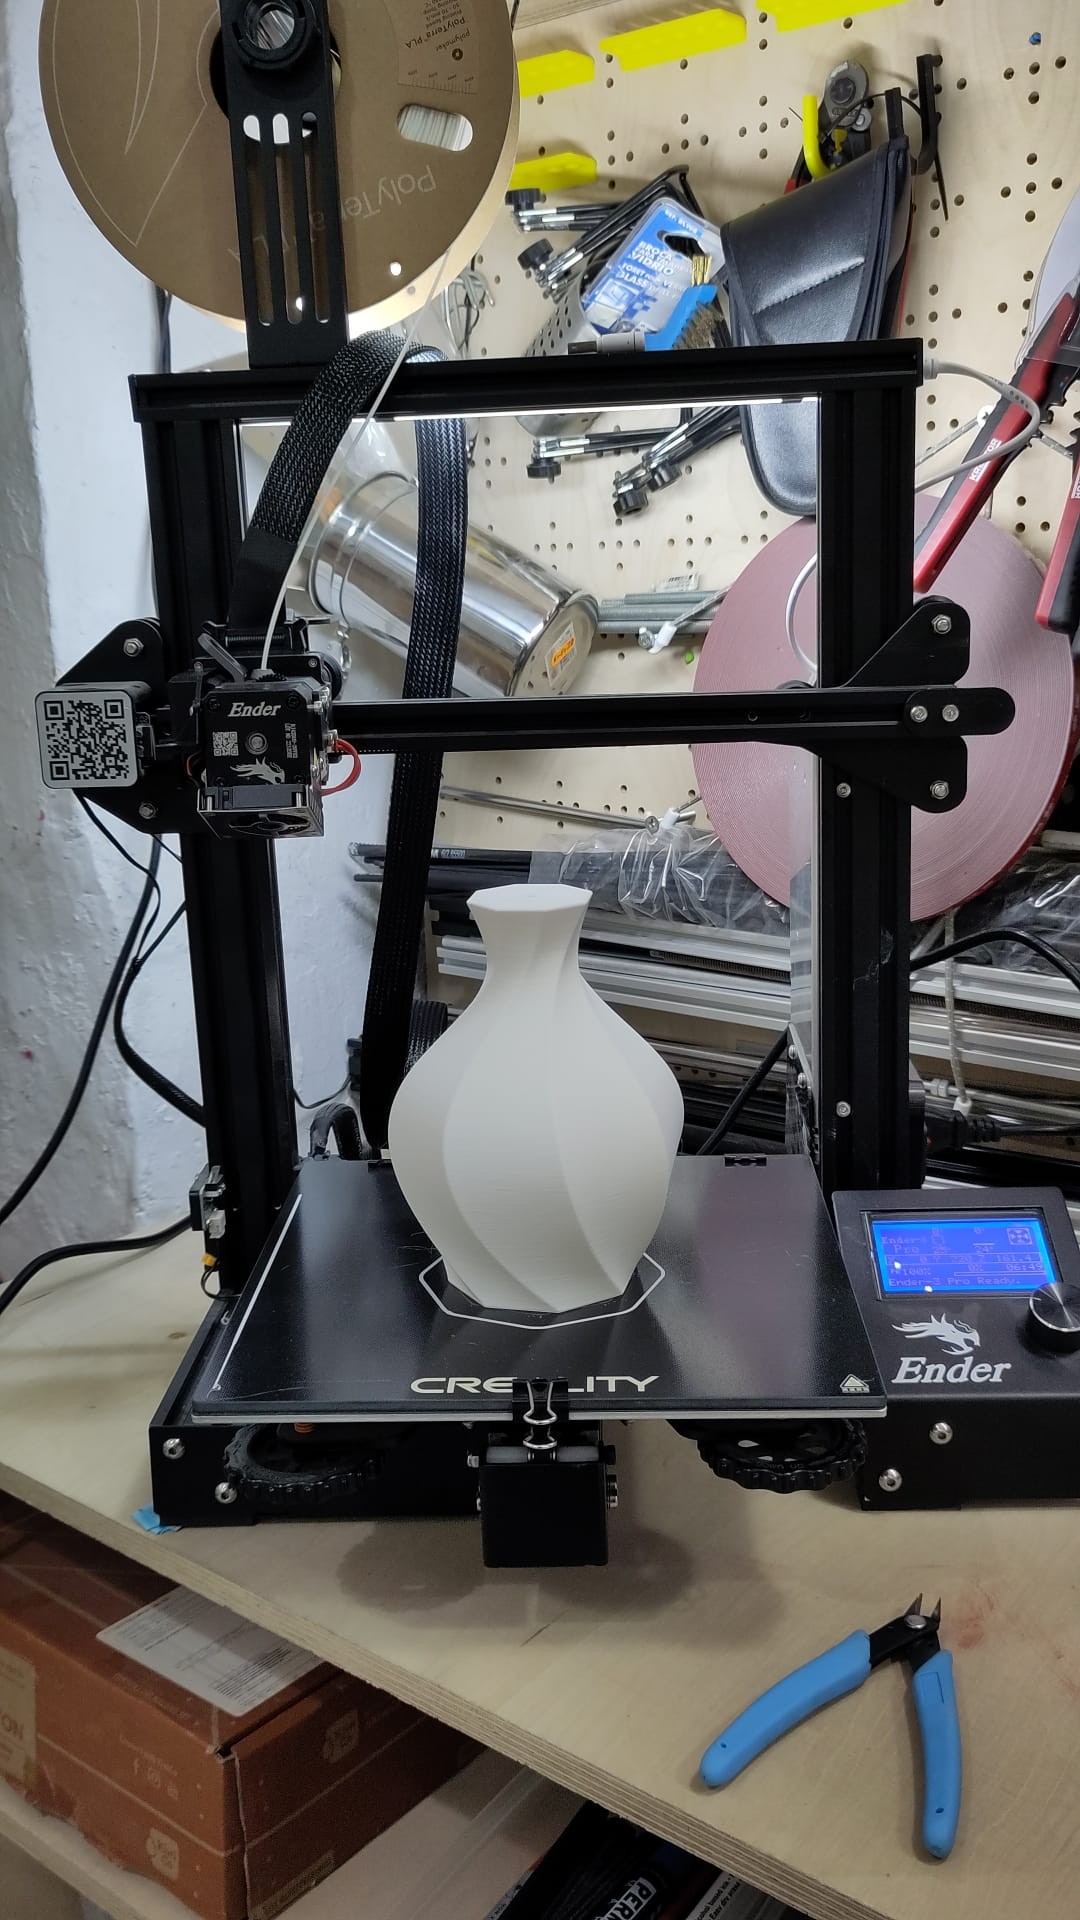
Settings: Choose your printer (e.g., Creality Ender-3 Pro), set quality (e.g., 0.2mm), and configure options like infill or supports.
Step 2: Add Filament
Filament Loading: Preheat the machine and insert PLA filament, ensuring it feeds correctly.
Step 3: Level the Bed
Calibration: Use Auto-home to set the bed level. Adjust with a piece of paper to ensure even pressure.
Step 4: Start Printing
Monitor the Process: Ensure the printer settings (temperature, etc.) match the slicer software, and stay nearby for the first layer to ensure accuracy.
Step 04.
Printing a Watering Can
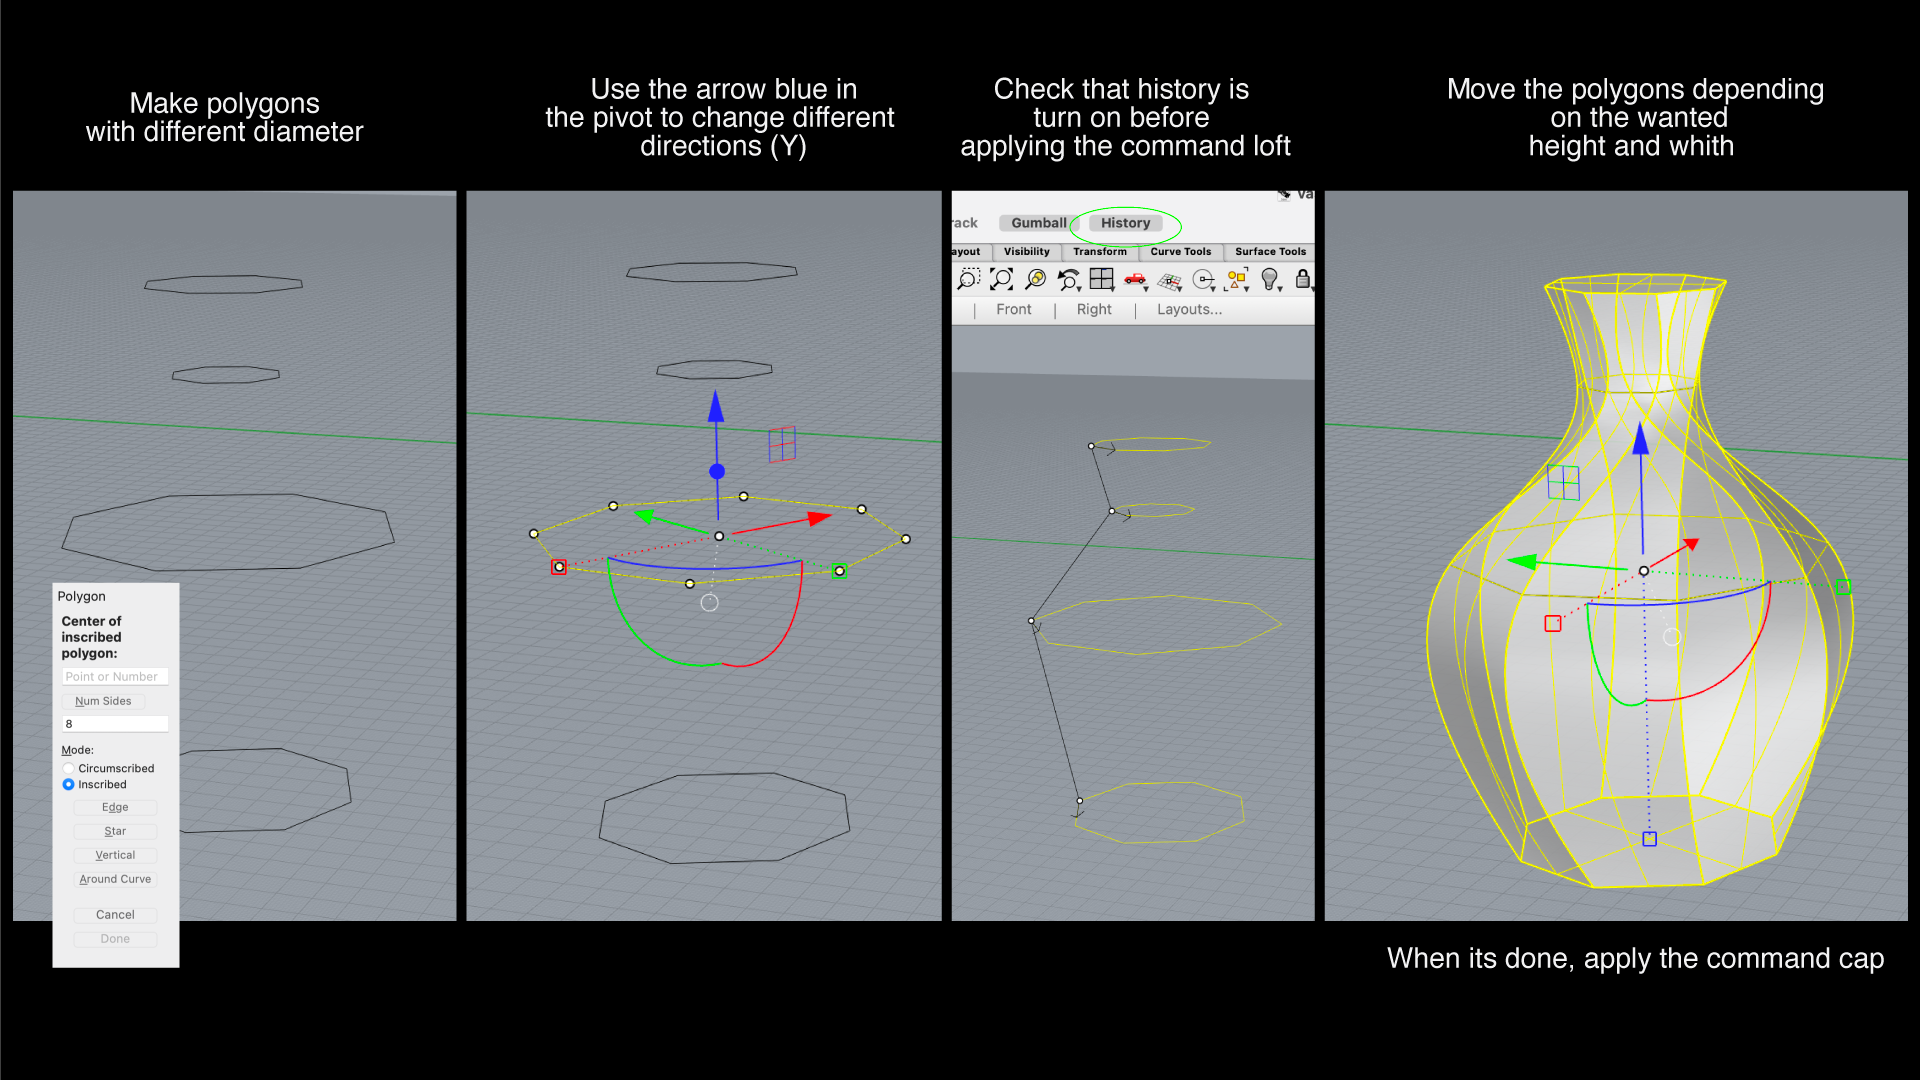
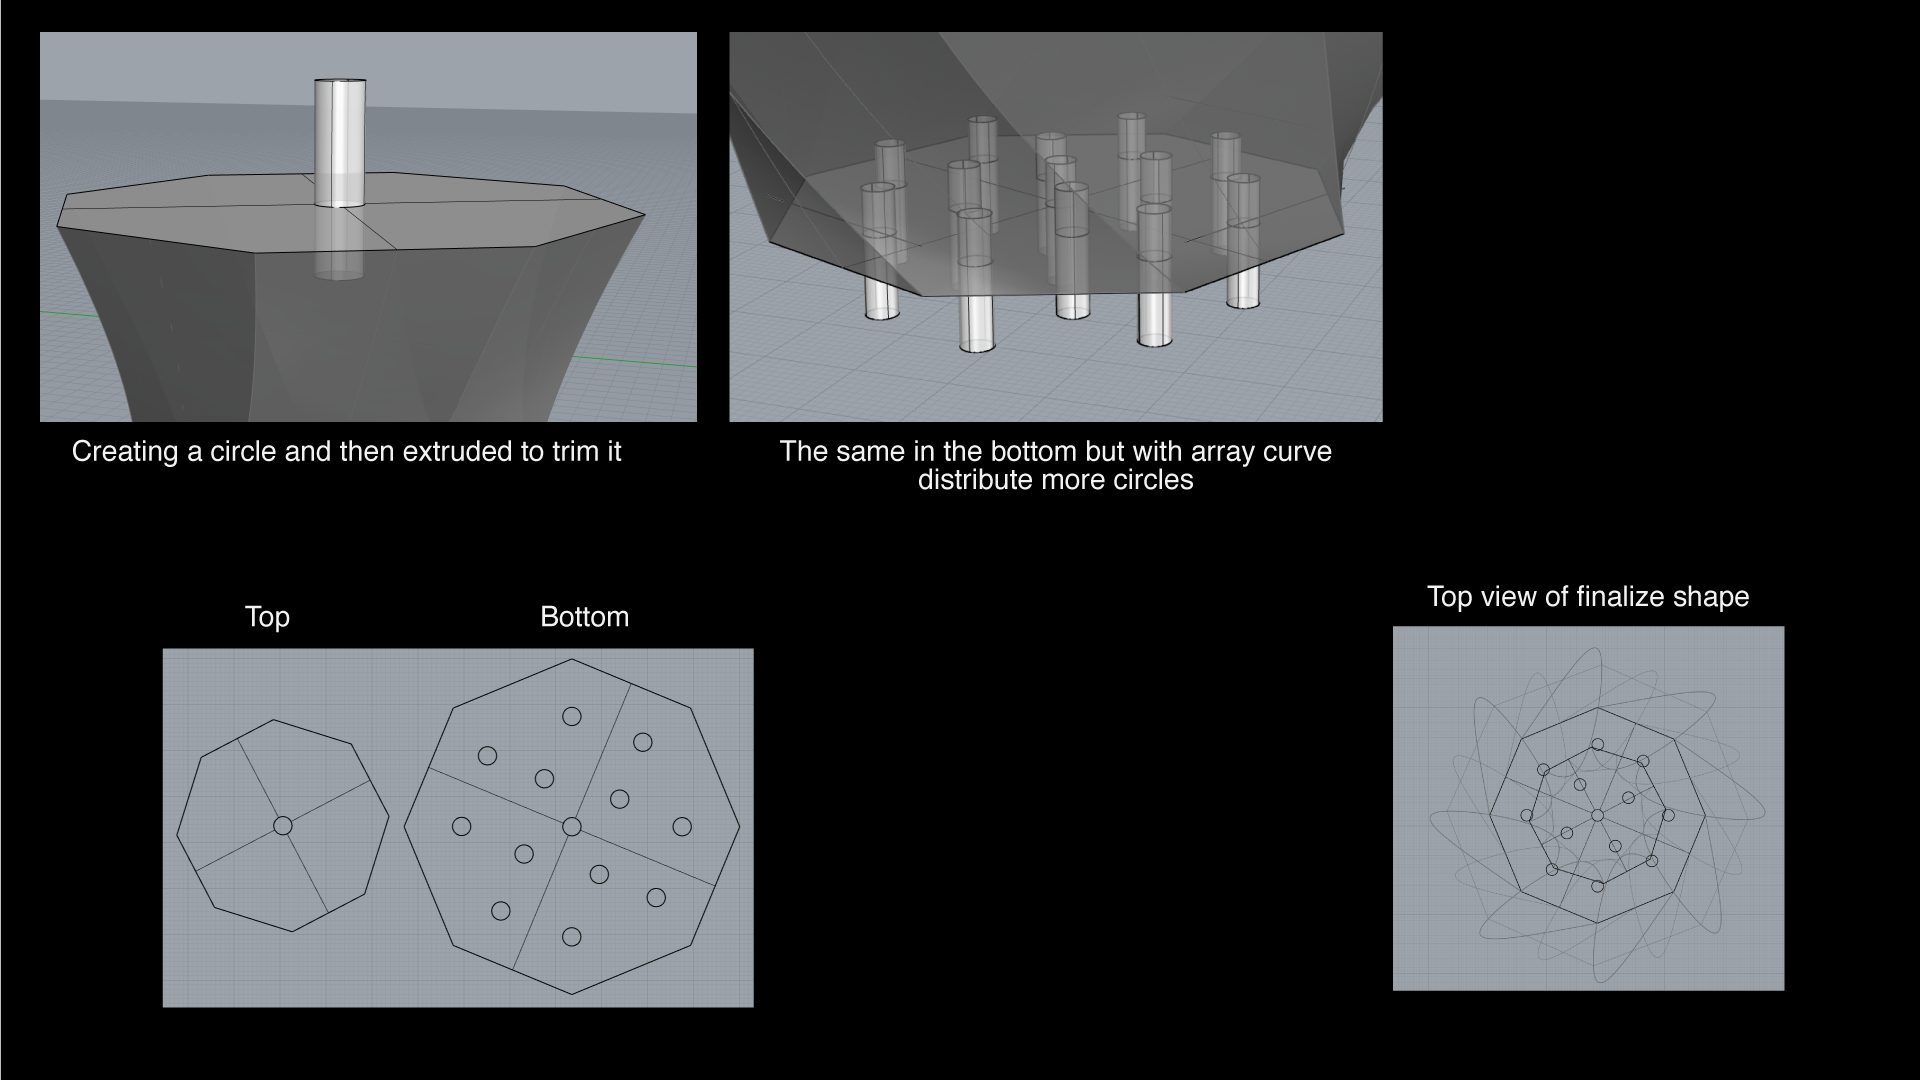
Objective: Design and print a watering can that holds water using internal structures only possible through 3D printing.
Design: Created a concentric geometric shape in Rhino, exported to Cura, and printed over 6 hours.
Result: A functional, hollow watering can with internal water flow controlled by small holes.